Linocut printing begins with selecting a linoleum block and carving tools. The desired design can feature anything that you desire, but the only limitation is the need for negative space and foreground-background distinction. The design is then sketched onto the block, typically with pencil or pen. Next, the negative space can begin to be carved away, ultimately leading to the creation of a mirrored print. Using an ink roller or even a simple paint brush, ink can be applied to the linoleum and then pressed onto various surfaces.
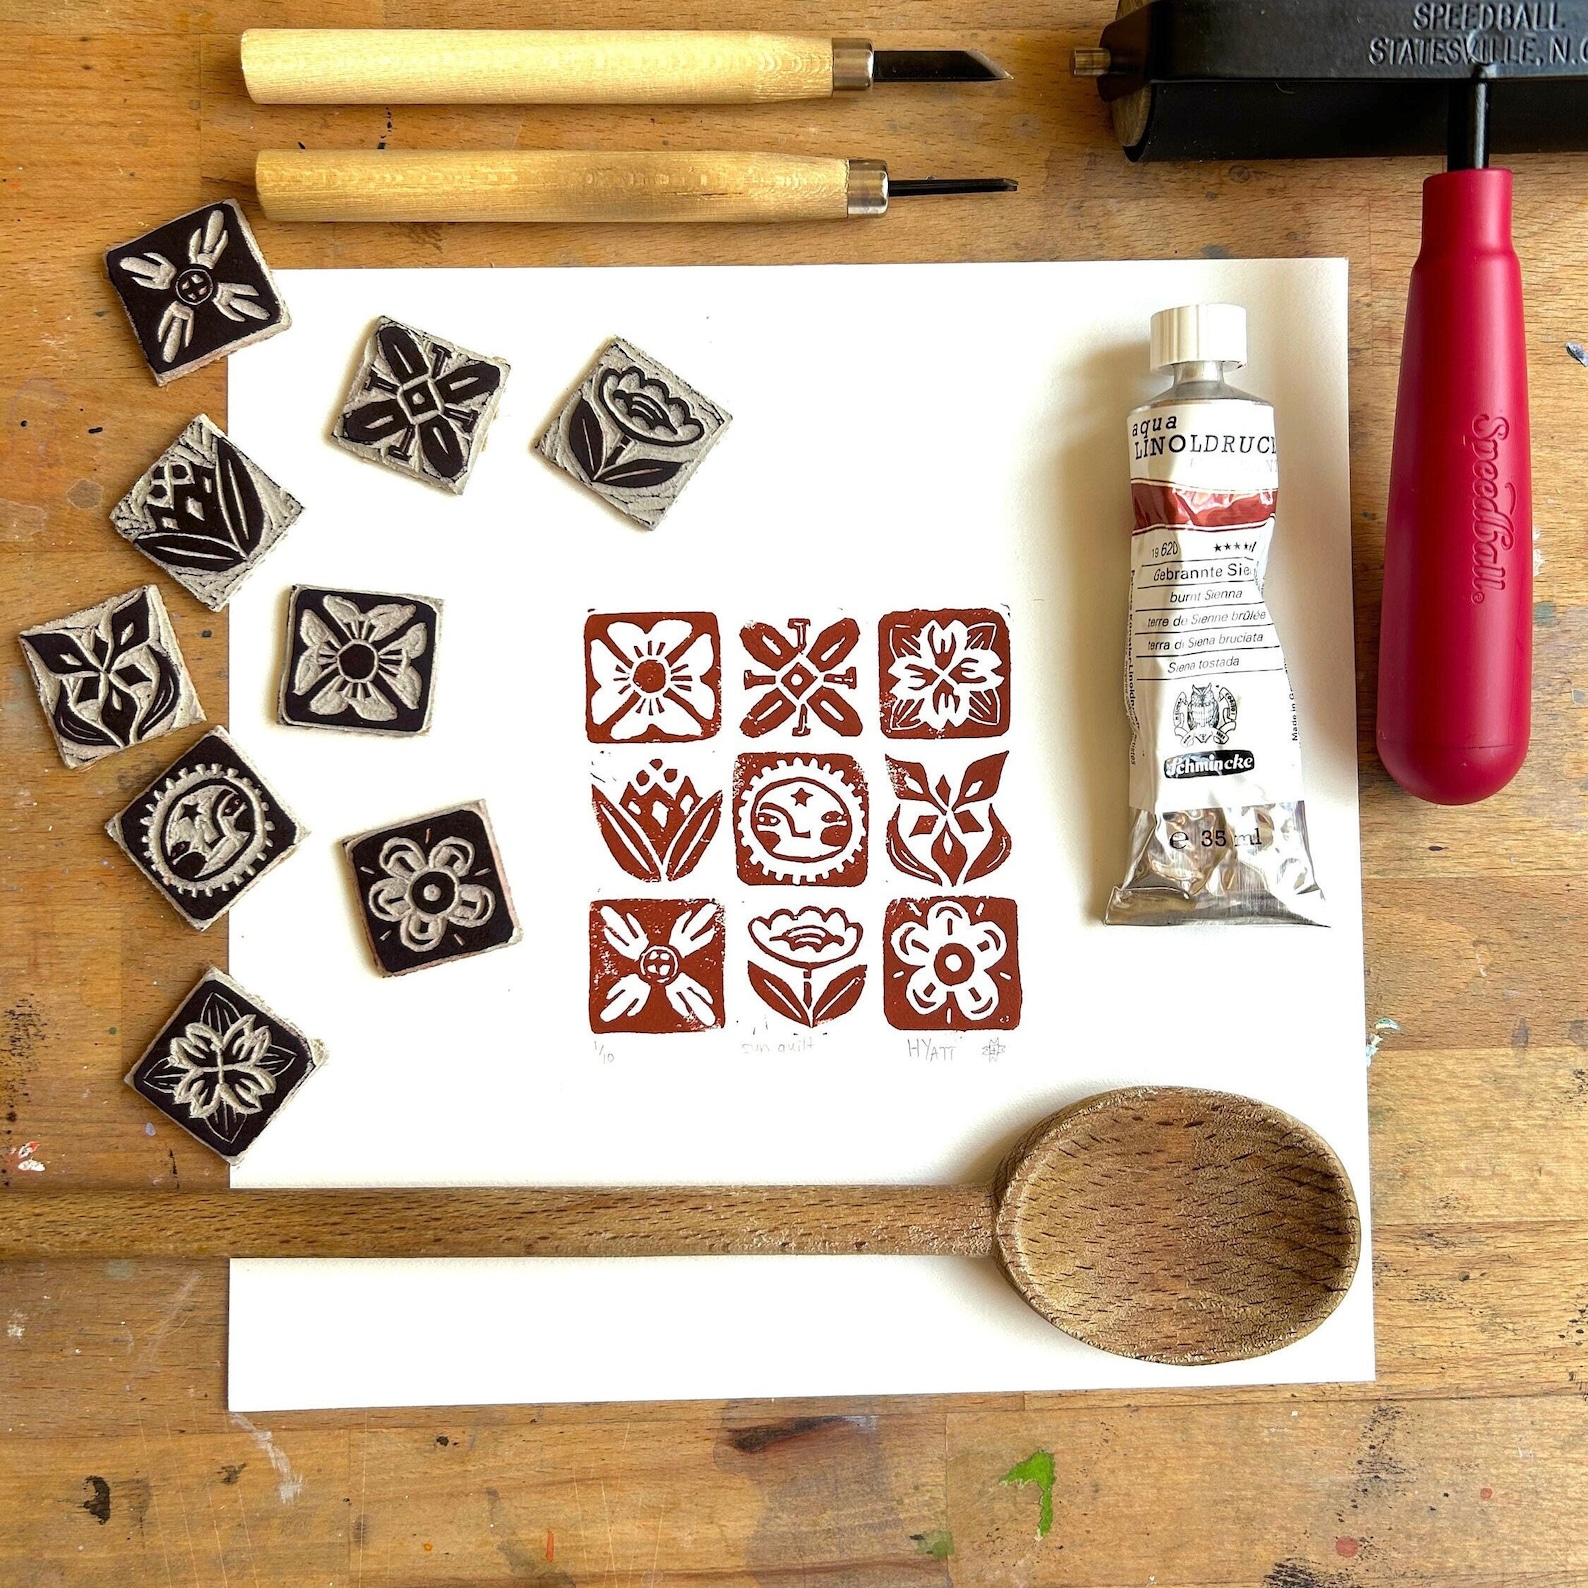
For beginners, pink rubber erasers work excellently as the block medium as they are easily accessible and affordable. Instead of carving tools, a small swivel head knife can be used to remove the excess block material. Linocut prints are great for a personalized and tactile art piece, it varies based on the pressure applied and the amount of ink used. Sometimes, linocut printing is also referred to as “block printing”. The steps and procedures are relatively simple and the technique remains the same for woodcut printing, with the exception of the block material.
Leave a Reply